If you do not like mess, don't look at these pictures haha. Anyhow, this is my wheel area in my parents' house. We have an enclosed and covered patio. When I started making pottery everyday (this was a few years ago), my parents bought me a wheel and let me take over the back quarter of the patio. In the picture, you can see our built in barbecue and under it is a small kiln. This kiln is for Precious Metal Clay, which I'll talk about later.
This is my wheel. Yes, it's been a long time since I've cleaned the wheel, the wall and the area around it. I think that it will finally be cleaned up when I move, but who knows when that will be... sigh...
These are my tools. I love my tools! There tools on the top are trim tools and ribs. The ribs are used for shaping. The trim tools are, obviously, for trimming. Most of these need to be sharpened or replaced. I've had them for a long time.
My lovely heat gun. This isn't the industrial strength heat gun that is my actual favorite, but it's still very good. (The industrial strength one is somewhere else, not sure where...) I use the heat gun to dry out my pieces when they get too wet (not a good thing as clay will flop over if it gets too wet). There are other reasons to use a heat gun, which I will get into later.
Ok, this is what I threw tonight. My good friend, Emma, wants a tagine. Now, I had a bit of an issue with forming the channel on the bottom part. The channel is where the lid rests and for some reason, I couldn't picture it in my head. Once I could, I had a hard time making my hands do what they needed to do to form a channel. Another excuse: I worked out for the first time in a long time yesterday and I'm all achy. I worked out my shoulders and upper body, so I was kind of weak. Both the top and the bottom are kind of off-center which makes me annoyed. However, as most people will tell you, no one ever puts their pots on a lazy susan or a something that spins so you can never see how off center a pot is.
Tomorrow, I will flip over the lid and form the top of the tajine, basically throwing both the top and the bottom of the lid, if that makes sense. I have to make sure I don't let the pieces get too dry or it will be hard to form the top of the lid properly.
Oh, and when I talk about trimming, you see how the bottoms of these pieces are not exactly neat? Well, trimming takes care of that. I might not have to trim the lid of the tajine if I do this right...
Wednesday, September 30, 2009
Monday, September 28, 2009
Kitty teapot
My realtor and his wife came to my last sale. In the middle of perusing my wares, their youngest daughter, who is away at university, called her mom. After talking with her mom, she got to talk to her dad who asked her: what kind of pottery would you like?
But, I get ahead of myself. This is the teapot as it is right now. I threw the body, lid and spout yesterday, heated each piece with a heat gun and then let them sit for awhile. Last night, before going to bed, I covered the pieces with a piece of dry cleaner's plastic (this is the best as it's not too thick and not too thin, gives just enough coverage that will allow the pieces to dry slowly). I did cover the spout earlier in the day because it was smaller and therefore faster drying. After doing this, I texted my realtor to find out what kind of object/animal his daughter likes because I could either make a normal, boring knob on the lid, or I could sculpt something cute. He replied that his daughter likes cats and their bichon frise puppy. Being a cat lover myself, I chose to sculpt a kitty.
She replied that she wanted a teapot... a purple teapot.
As I had no teapots for sale, this became a commissioned piece. I have been wanting to make a teapot again since I haven't made one in years and at one point, was complimented by a senior potter that I was making the best teapots in the studio. (I shall take pictures of Blossom Hill Crafts one day, so you may see this wonderful place.) At any rate, I made a few teapots, sold them and then, sort of lost interest or something...
Anyways, back to the purple teapot. When working in a high fire studio (cone 10 or about 2345ยบ F), you learn that there are a few colors that are difficult to achieve. Of course, purple is one of them. There are some glaze recipes out there for purple, but sometimes, depending on the firing, they tend toward blue... I used to use one glaze called Hatcher Purple. It was pretty reliable and although I never experienced it running, it can run (basically the glaze drips/flows down the side of the pot, off of the pot and onto the expensive kiln shelves thereby fusing the pot to the kiln shelf which will then need to be replaced depending on how bad the run is).
At any rate, the teapot is now in a stage called "leather hard". At this stage of dryness, it is the time to trim the bottom of the pot so that it looks neat and pretty. It's also the stage when it's best to attach such parts as spouts or handles or kitty knobs. I plan to add a bamboo handle to this teapot when it's done (I prefer teapots with bamboo handles rather than attached handles), so that's why there are loops at the front and back.
I'll try to take pictures of the bisque stage and will definitely take pictures of the finished purple piece.
By the way, the phoenix pot is now completely dry and ready for bisquing. Yes, it takes a long time to finish one piece of pottery.
Sunday, September 27, 2009
Spring Valley Anagama
With the beginning of Autumn comes the beginning of the wood kiln firing season. This is the wood kiln, I'll have to search through some old pictures so I can show you the size of this thing. Or, I could just take more pictures throughout the next few months and show you what it's like.
Wood firing is pretty interesting. You fire up the kiln, and keep it firing for 5 days straight. People stoke the fire and keep it going using... wood (hehe, of course), 24 hours a day. The results are pretty interesting. Some people don't like it because the colors are kind of dull. But, I figure, any time you can set a fire legally and keep it going for 5 days straight... that's pretty darn cool.
This is the noborigama (chambered) kiln. I think that it's also the 'salt' kiln. You can't use salt in all kilns because the salt tends to break down the walls of the kiln. Still, the results can be quite pretty... blues, greens along with the whites and natural colors you get from a wood firing.
Color wood. In wood firing, you tend not to rely on glazes or chemicals put on pots to get color. You use a liner glaze and maybe some decorative strokes of a paint brush, but mostly you rely on what type of wood you use to get nice results.
More color wood. By the end of the firing season, we should be through with all the wood in this pile.
Kindling and stoking wood. These will have to be sorted and cut into about 3 feet lengths. Stokers use this wood on the side of the kiln to keep the back of the kiln firing and hot.
More stoking wood.
Here are some results from firing this kiln. The 'sculpture' in the bottom left is a bunch of pots that got stuck together in the last firing. It happens. If pottery teaches you anything, it's detachment from your treasured piece of pottery until you get it safely home. And to not have expectations... And sometimes, these 'mistakes' are pretty cool in themselves.
This is an owl I made a few years ago. I think it was refired because it originally was plain white. The slight green you see is from the wood ash. Wood ash will 'melt' into a glossy, glassy green. It's highly prized amongst the potters who fire this kiln.
As the season of wood kiln firing progresses, I'll post more pictures and give more information about this fun yet laborious technique, such as why we wait until the rainy season and how hot the kiln gets. I might also be able to post pictures of the interior of the kiln when it's firing. That's always fun :D
Tuesday, September 22, 2009
Phoenix pot part 1
Last Tuesday, I threw a "poofer" pot. I don't think it's a technical term, but basically, it's a pot where you "poof" it out. It has a narrow base, wide mid-section and hopefully a very narrow opening. The opening on mine is a little wide, so it needed a lid.
On Sunday, the sale was a bit slow in terms of customer flow, so I trimmed up (cleaned the bottom) the poofer pot and then added a phoenix to the lid.
First, I shaped the body. Clay doesn't like to be thick and thin in the same piece. It can lead to cracking issues when a piece dries. So, I balled up a piece of newspaper and wrapped some clay around it to form the body. I smoothed the clay out and then pulled the clay using a lot of water and a gentle stroking of the fingers to form the neck of the phoenix.
Rolled up a small ball of clay for the head and then made and attached a beak. Scored the body and the lid, dripped a little bit of water on scored area to form a slip and then pressed the body onto the lid to get them to be one.
Then came pulling more clay and shaping it into curls for the head and tail feathers. After these had dried a bit (so that they kept their shapes, but were still malleable), I attached them to the body of the phoenix.
The pot itself had a nice shape, but I wanted it to look like it was part of the whole sculpture, so I added some snakes (also pulled from a lump of clay), scored and attached them to the pot.
After attaching the snake to the pot, I smoothed it and formed a peak to make it seem more like flames rather than snakes.
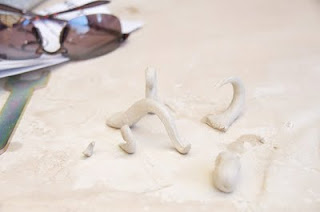
6 snakes attached and the bird on the lid.
I like this view.
The back side, so you can see what the tail feathers look like.
In looking at these photos, I should probably have added more snakes to the body of the pot, but it was hot and I was tired. I might do more decoration (with glazes, not with more additional clay) when it comes time to glaze the pot. HOWEVER... I did cover the piece so that it will dry slowly, so it might be possible to add more clay... Hmmm... I'll have to check tonight to see if it's possible. If not, oh well...
The next hard part comes in figuring out how to finish this pot once it gets bisque fired... I'm not sure how I want to go. Raku firing would produce some gorgeous colors (if I get it right), but the piece would be much more delicate. Low-firing would be an option. The colors would be less vibrant, but the piece would still be delicate. High-firing would be great for strength, but not so much on the colors... As soon as I decide, I'll let you all know.
Saturday, September 19, 2009
Welcome!
Greetings! And welcome to my blog about my pottery. I've been a potter/ceramic artist for about 12 years now. I started at Foothill College, taking handbuilding and wheel throwing classes for about a year. I lived in Japan for two years and was fortunate enough to study with a potter on the tiny island where I lived. When I returned to California, I found Blossom Hill Crafts, a clay studio that focuses on teaching people how to throw pottery. Please check the link out so you can see what all this place offers. It's a wonderful studio and there are many wonderful people who work here. We're very much like a family at BHC. I can't imagine what my life would be like without the studio or my friends here.
After a few years of taking classes and throwing on my own, I was asked to become one of the teachers. I did that for awhile, being a full time potter. Unfortunately, being a potter did not pay the bills. So, I went back to school to study 3d animation which took up a lot of time and I was not able to play in the mud anymore. After a few years away, not really working in clay, I returned this past spring. It was the best decision ever.
Today, we had day One of our annual Fall pottery sale. The picture above was half of what I was selling. The picture below is the rest.
As you can see, I threw a lot of cups and bowls. The BHC sale tends to cater to people who like bowls... lots and lots of bowls. Usually, cobalt blue bowls sell the best. However, I kind of got bored with the typical blue bowl, so I glazed them green/aqua, beige and tenmoku. I've sold a few, but I might have to make a few blue bowls if I want to start making a bit more money. However, I'm not really in this for the money... well, sort of. Basically, the more I sell, the more I have room to make. It's kind of tough to cart around a ton of bowls between the studio and my home. There's not always enough room for all my pottery in my parents' house... I have a storage unit where I used to store all my stock. I store other things in that unit now, but I can see that I might be putting more pottery in there in the future months.
Above are some chopstick rests. Before my time away from pottery, I would make 1.5 lb porcelain bowls and carve them. Not really doing that anymore, and I only really had about a month to prepare for this sale. So, I made cheap chopstick rests out of my favorite porcelain, Southern Ice... from Australia... love this clay because it is the most translucent porcelain that I have found. After bisque firing the rests, I brushed on a Deep Aqua glaze. This glaze tends to pool in cracks/texture and you get the above result.
I also made some pendants out of Southern Ice. This is the first time I've made jewelry out of clay. How did I do this? I rolled out a thin slab of clay, cut them out using a fondant cutter, let them dry completely to at state we call "bone dry", painted the images with underglaze, bisque fired them and then put a clear glaze on them at the end.
All of these pieces were fired to cone 10 (about 2345 degrees F). No lead in the glazes either (I'll write more about that later). Bowls are functional... dishwasher, microwave and oven safe.
Finally, this is a Tenmoku glazed bowl. Tenmoku is a brown to black glaze. The dark loop design you see is a squirt of the Navy blue glaze that I just put on there to break up the monotony of a single color glaze.
So, this is my intro to my life as a potter. I have an idea of what I'm going to do during the down time of our sale tomorrow. Hopefully, I'll be able to take pictures and let you all see some of the process of what goes on in making a piece of ceramic art.
Subscribe to:
Posts (Atom)