On Sunday, the sale was a bit slow in terms of customer flow, so I trimmed up (cleaned the bottom) the poofer pot and then added a phoenix to the lid.
 First, I shaped the body. Clay doesn't like to be thick and thin in the same piece. It can lead to cracking issues when a piece dries. So, I balled up a piece of newspaper and wrapped some clay around it to form the body. I smoothed the clay out and then pulled the clay using a lot of water and a gentle stroking of the fingers to form the neck of the phoenix.
 Rolled up a small ball of clay for the head and then made and attached a beak. Scored the body and the lid, dripped a little bit of water on scored area to form a slip and then pressed the body onto the lid to get them to be one.
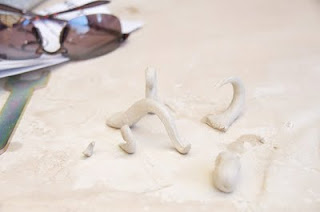
 Then came pulling more clay and shaping it into curls for the head and tail feathers. After these had dried a bit (so that they kept their shapes, but were still malleable), I attached them to the body of the phoenix.
 The pot itself had a nice shape, but I wanted it to look like it was part of the whole sculpture, so I added some snakes (also pulled from a lump of clay), scored and attached them to the pot.
 After attaching the snake to the pot, I smoothed it and formed a peak to make it seem more like flames rather than snakes.
 6 snakes attached and the bird on the lid.
 I like this view.
 The back side, so you can see what the tail feathers look like.
In looking at these photos, I should probably have added more snakes to the body of the pot, but it was hot and I was tired. I might do more decoration (with glazes, not with more additional clay) when it comes time to glaze the pot. HOWEVER... I did cover the piece so that it will dry slowly, so it might be possible to add more clay... Hmmm... I'll have to check tonight to see if it's possible. If not, oh well...
The next hard part comes in figuring out how to finish this pot once it gets bisque fired... I'm not sure how I want to go. Raku firing would produce some gorgeous colors (if I get it right), but the piece would be much more delicate. Low-firing would be an option. The colors would be less vibrant, but the piece would still be delicate. High-firing would be great for strength, but not so much on the colors... As soon as I decide, I'll let you all know.


Whoa! Way cool! Can't wait to see the finished piece. I'd be interested in this one!
ReplyDeleteThis comment has been removed by the author.
ReplyDeleteDon't you hate it when you hit post and then realize just how many spelling errors there were? lol
ReplyDeleteI like that angle too, it makes the phoenix look very wise.
I also think that you might want to consider raku again. If everything goes right, it would look very primal and reborn-out-of-the-ashes. But that's just my opinion, I'm looking forward to seeing how this piece turns out. =)